By Kshetez Vinayak, founder of SupaSidebar. Last updated May 10, 2026.
TL;DR:
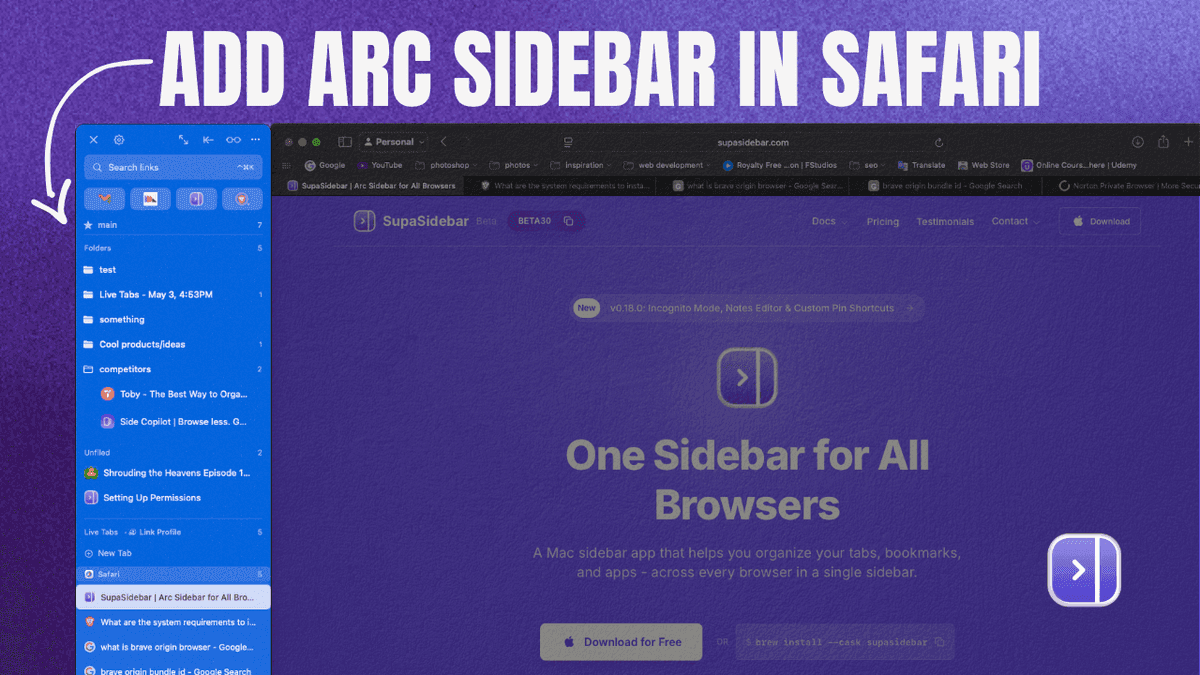
The fastest way to add a real Arc-style sidebar to Safari on Mac in 2026 is to install SupaSidebar, a native macOS menu bar app. Setup is five steps and roughly five minutes: download, grant Accessibility permission (System Settings > Privacy & Security > Accessibility), grant Automation permission for Safari (System Settings > Privacy & Security > Automation > SupaSidebar > Safari), pick the "Browser Sidebar" onboarding preset, choose Live Tabs over Recent. Safari's built-in sidebar shows Tab Groups, Bookmarks, and Reading List but does not provide vertical tabs or replace the horizontal tab bar - that gap is what this guide fixes. Jump to the 5-step setup, the Smart Attach vs Independent decision, Safari-specific caveats, or troubleshooting.
If your main need is vertical tabs specifically (not a sidebar broadly), see Safari Vertical Tabs: All 3 Options Compared - this guide is for the install + setup of a Mac sidebar app.
Looking for something specific?
- Want the category overview (what is a Mac sidebar app)? → Mac Sidebar App: The Universal Sidebar Category
- Why Safari extensions can't do this and what the alternatives are? → Safari Sidebar Extension Guide
- Comparing browser-sidebar extensions broadly? → Browser Sidebar Extensions for Mac
- Want vertical tabs in Safari, not a full sidebar? → Safari Vertical Tabs: All 3 Options Compared
What "Adding a Sidebar to Safari" Actually Means
Safari does ship with a sidebar - the panel on the left that toggles via the View menu or the sidebar icon in the toolbar. That panel shows three things, depending on what's selected: Tab Groups, Bookmarks, or Reading List, per Apple's Safari User Guide.
That is not what most people mean when they say "Safari sidebar." When users search for "how to add a sidebar to Safari," the intent is almost always one of these:
- A persistent panel showing tabs, bookmarks, and shortcuts at the same time (not toggled open and closed)
- A workspace-aware sidebar with grouping by project, work, or context (Arc Spaces)
- A sidebar that works the same way across Safari, Chrome, and any other browser open on the Mac
- An Arc-style chrome surface that lives next to the browser window all day
Safari's built-in sidebar covers none of those. The narrower question of how to get vertical tabs in Safari has its own answer set (extensions, native sidebar tweaks, sidebar apps) - that's covered in Safari Vertical Tabs: All 3 Options Compared. This guide is about the broader sidebar surface.
So "adding a sidebar to Safari" in the practical 2026 sense means using a third-party tool that adds the missing UX. Two paths: a Safari extension, or a native Mac app. The Safari extension path is heavily limited because of how Apple sandboxes extensions - covered in the Safari Sidebar Extension Guide. The native Mac app path is what this walkthrough covers.
Why a Native Mac App, Not an Extension
Safari extensions run inside an App Sandbox and use the Safari Web Extensions API. The API can modify webpage content, add toolbar buttons, and read tab metadata. It cannot replace Safari's tab bar, hide the horizontal tab strip, or inject persistent UI into the browser chrome. That is by design - Apple's security model treats Safari's UI as part of the OS, not as a surface third parties can rewrite.
A Mac sidebar app sidesteps this constraint by running outside Safari entirely. The app sits in the macOS menu bar and reads tab data from Safari via AppleScript and the macOS Accessibility API. The sidebar then renders next to the Safari window. Functionally, the result looks like Arc - a vertical panel with tabs, bookmarks, and Spaces. Architecturally, it is a separate process that happens to be aware of Safari. For a side-by-side of the Safari extension options that fall short, see Best Safari Sidebar & Tab Extensions for Mac.
SupaSidebar uses this exact approach. The full category context - what a Mac sidebar app is, how it differs from browser extensions, and why the category exists in 2026 - is covered in the pillar Mac Sidebar App. For setup, what matters is the two macOS permissions the architecture requires: Accessibility (so the app can position the sidebar against Safari's window) and Automation (so the app can read Safari's tab list via AppleScript). Both are toggles in System Settings, both are reversible, and neither gives the app access to anything beyond what Safari already exposes.
The 5-Step Safari Sidebar Setup
Total time: about five minutes. The steps are sequenced so each permission is granted at the moment SupaSidebar asks for it, which avoids the most common failure mode (Safari not appearing in the sidebar's tab list because Automation was skipped).
Step 1: Download SupaSidebar
Go to supasidebar.com and download the latest release. The download is a notarized DMG signed with an Apple Developer certificate. Drag the app to the Applications folder, eject the DMG, and open SupaSidebar from Applications.
The free tier includes the full sidebar UX and three Spaces. Safari setup does not require a paid plan. Pricing details are on the website; this guide does not depend on tier.
Step 2: Grant Accessibility Permission
On first launch, SupaSidebar shows a permission prompt explaining why it needs Accessibility access. Click "Open System Settings." The Privacy & Security pane opens at System Settings > Privacy & Security > Accessibility. Find SupaSidebar in the list and toggle the switch on. A macOS dialog asks for the admin password to confirm the change.
Why Accessibility matters for Safari users specifically: this permission is what lets SupaSidebar position the sidebar against the Safari window edge, prevent Safari from sliding underneath it, and auto-tile windows when Smart Attach is enabled. Without it, the sidebar still works as a free-floating panel, but the "attached to Safari" behavior - the part that makes it feel like Arc - will not engage.
If the prompt was dismissed before granting, open SupaSidebar's Preferences > Sidebar > Browser Integration Mode and click "Grant Accessibility Permission" to re-trigger the dialog.
Step 3: Grant Automation Permission for Safari
This step is the one most likely to be skipped, and the one that breaks Live Tabs for Safari if missed. After Accessibility is granted, SupaSidebar shows a second prompt asking for permission to control Safari via AppleScript. Click "Allow" in the dialog.
If the dialog was dismissed, open System Settings > Privacy & Security > Automation. Under "SupaSidebar," there should be a toggle labelled "Safari." Turn it on. The next time SupaSidebar polls Safari for tab data, the tabs appear in the sidebar.
Why this is Safari-specific: Chrome, Firefox, Edge, Brave, and other browsers expose tab data through both AppleScript and the Accessibility API, so SupaSidebar can fall back gracefully. Safari only exposes tab data through AppleScript via the Safari AppleScript dictionary, which means the Automation toggle is required for Safari to appear in Live Tabs. No toggle, no Safari tabs.
Step 4: Pick the "Browser Sidebar" Onboarding Preset
After permissions, SupaSidebar shows a goal-driven onboarding screen with four preset cards: Bookmark Manager, Workspace Switcher, Browser Sidebar, and Minimal Launcher. For Safari users coming from Arc or coming to a sidebar for the first time, the right pick is Browser Sidebar.
What this preset configures: Live Tabs section enabled, Smart Attach enabled, sidebar position set to right edge, Pinned section visible, and a default Space called "General" pre-created. The configuration matches the typical Arc-to-Safari workflow - tabs in a vertical list, bookmarks alongside, persistent across browser sessions.
The other three presets exist for users with different goals: Bookmark Manager hides Live Tabs and emphasizes saved-link organization; Workspace Switcher emphasizes multiple Spaces with quick switching; Minimal Launcher shows only Pinned items in a narrow Discord-style column. None of these are wrong for Safari, just optimized for different intents. The preset is changeable in Preferences after install, so the choice here is not permanent.

Step 5: Choose Live Tabs Over Recent
The final onboarding step asks: Live Tabs or Recent? These are the two options for what occupies the third sidebar section.
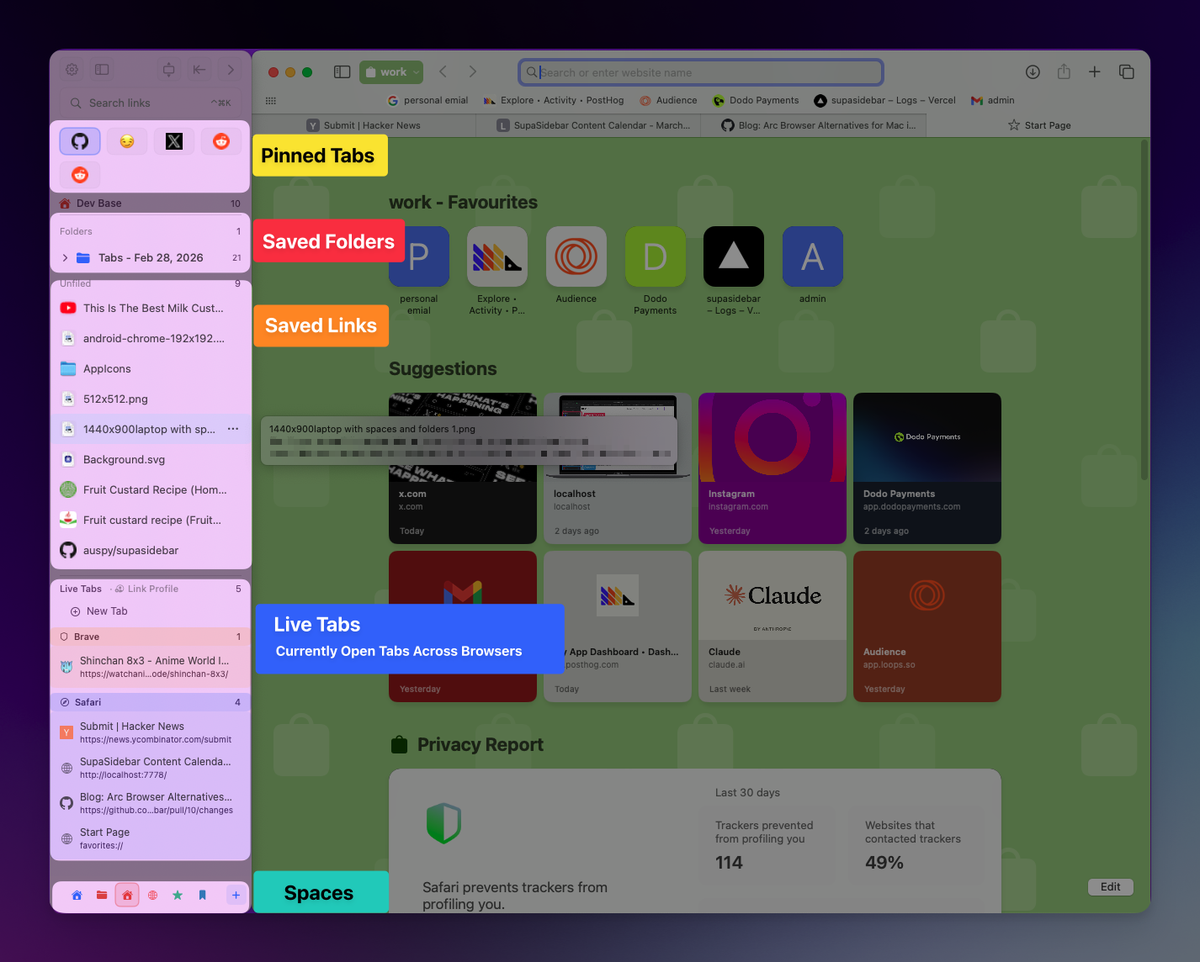
Live Tabs
shows currently open browser tabs in real time, grouped by browser. Clicking a tab in Live Tabs activates the existing tab in Safari rather than opening a duplicate. SupaSidebar polls Safari at 0.5 seconds when the sidebar is visible and 5 seconds when hidden. Tab deduplication across browsers is on by default in version 0.17.0 and later.
Recent
shows recently visited pages in time order, capped at 30 items by default, deduplicated. Clicking a recent item opens a new tab.
For an Arc-style Safari workflow, Live Tabs is the right choice. The whole point of an Arc-style sidebar is that the tab list lives in the sidebar, not the tab bar - which only works if the list reflects what is currently open. Recent is better suited to a launcher workflow where the sidebar is a quick way to revisit pages, not a tab manager.
After this step, the sidebar appears, attached to the right edge of the Safari window, with current Safari tabs in the Live Tabs section. Setup is complete.
Smart Attach vs Independent Mode (the One Decision That Matters)
After install, the only meaningful behavioral choice is Smart Attach vs Independent mode, set during onboarding via the Browser Sidebar preset (Smart Attach is the default) and changeable in Preferences > Sidebar > Browser Integration Mode.
| Mode | Behavior | Required permissions | When it fits |
|---|---|---|---|
| Smart Attach (recommended) | Sidebar attaches to the active browser window. Safari is prevented from sliding underneath. Overlapping windows auto-move. Optional automatic window tiling. | Accessibility | Single-monitor Mac, sidebar should always be next to Safari |
| Independent | Sidebar opens on a fixed screen edge with no browser interaction. No tiling, no attach behavior. | None beyond Automation for Safari tab reads | Multi-monitor setup, sidebar lives on a side screen, browsers move freely on the main screen |
For most Safari users on a single monitor (the common Mac setup), Smart Attach is the right answer. It is the mode that produces the Arc-like behavior where the sidebar feels like part of the browser even though it is a separate app. Independent mode is the right answer for users with three monitors who want the sidebar pinned to a side screen while Safari stays on the main one.
Toggle Fill Screen with ⌘⌥F when Smart Attach is on - this expands Safari to fill the screen alongside the sidebar, which is the closest to Arc's full-screen behavior.
Safari-Specific Caveats (Honest Limits)
Safari is more sandboxed than Chrome and Firefox in three ways that affect how SupaSidebar interacts with it. None of these are dealbreakers for the standard Safari-with-a-sidebar use case, but they matter to know upfront.
Polling delay is slightly higher.
Chrome and Firefox respond to AppleScript queries faster than Safari does. The visible effect: a tab opened in Safari shows up in Live Tabs within about 0.5 seconds; in Chrome it is closer to instant. Imperceptible for most workflows; noticeable if rapidly switching tabs.
No per-tab audio indicator.
Safari does not expose tab audio state through AppleScript, so the "this tab is playing audio" icon Chrome users see in Live Tabs is not available for Safari tabs. Workaround: Safari shows the audio indicator in its own tab bar.
Window detection is per-window, not per-tab-group.
SupaSidebar reads tabs from the active Safari window. If Safari is open with multiple windows, switching the focused window switches which tab list shows in Live Tabs. This matches how Chrome and Firefox behave; called out here because Safari users coming from Arc may expect cross-window unification, which neither Safari's API nor SupaSidebar's current architecture supports.
The sibling Safari Sidebar Extension Guide goes deeper on why these limits exist (the App Sandbox model and Safari's WebExtensions API). For setup purposes, the takeaway is: Safari support works, with the caveats listed.
Troubleshooting: When Setup Doesn't "Just Work"
The five most common Safari-specific setup issues and the actual fix for each.
1. Safari tabs are not showing up in Live Tabs.
Almost always Automation permission. Open System Settings > Privacy & Security > Automation, find SupaSidebar, and confirm the "Safari" toggle under it is on. If the toggle is missing entirely, quit SupaSidebar, relaunch it, open Safari with at least one tab, and let SupaSidebar trigger the dialog again.
2. Sidebar opens but does not attach to Safari.
Accessibility permission was denied or revoked. Open System Settings > Privacy & Security > Accessibility, confirm SupaSidebar is in the list with the toggle on. If it is not in the list, open SupaSidebar Preferences > Sidebar > Browser Integration Mode and click "Grant Accessibility Permission" to re-trigger the dialog.
3. Sidebar appears, then disappears when Safari is clicked.
Smart Side Switch may be flipping the sidebar to the other screen edge to avoid covering another window. Check Preferences > Sidebar > Smart Attach and disable Smart Side Switch if the constant flipping is unwanted.
4. Permissions were denied. Reset and start over.
Open System Settings > Privacy & Security. In both Accessibility and Automation, find SupaSidebar and toggle off, then quit SupaSidebar, relaunch, and re-grant when prompted. macOS will not re-show the original prompts for an app that already exists in the lists, so toggling off (not removing) is what re-triggers the flow.
5. Safari Technology Preview tabs are not detected.
Safari Technology Preview is a separate AppleScript target. Add it under Preferences > Browsers (it is not enabled by default) and grant Automation permission specifically for Safari Technology Preview when prompted.
What to Use Safari's Native Sidebar For (Don't Disable It)
Safari's built-in sidebar (View > Show Sidebar, or the toolbar icon) does have legitimate uses even after SupaSidebar is set up. The two that matter:
- Reading List lives in Safari's sidebar and syncs via iCloud across Apple devices. SupaSidebar does not replicate Reading List.
- Bookmarks in Safari's sidebar sync to iPhone and iPad via iCloud Bookmarks. SupaSidebar's bookmarks sync across Macs via iCloud but do not show up on iOS.
The recommended setup: keep Safari's native sidebar disabled by default (toggle it off in View > Hide Sidebar), use SupaSidebar as the daily driver for tabs and bookmarks, and toggle Safari's native sidebar on temporarily when accessing Reading List or syncing a bookmark to iPhone.
Safari's Tab Groups and SupaSidebar's Spaces are separate systems that do not interact. A Safari Tab Group does not automatically become a SupaSidebar Space, and vice versa. Most users pick one - usually Spaces, since it works across Chrome and Firefox too - and ignore the other.
What Happens After the First 5 Minutes
The sidebar is installed and Safari tabs are visible. The first three workflow patterns most Safari users settle into:
Pin the daily-driver tabs.
Right-click any tab in Live Tabs and choose "Pin to Sidebar." Up to 9 pinned items are accessible via ⌘⌥1 through ⌘⌥9 from anywhere on the Mac. Gmail, Calendar, the docs URL for the current project, the open ticket queue. Pinned items stay visible across all Spaces.
Save the next bookmark with ⌘⌃S.
Smart Save captures the current Safari tab as a saved link in the sidebar. If Air Traffic Control rules are configured later, the link routes to the right Space automatically.
Open the Command Panel with ⌘⌃K.
This searches across saved links, pinned items, live tabs from every browser, folders, and Spaces. For Safari-specific queries, it also searches the active Safari window's tab titles, which is the closest equivalent to Arc's Cmd+T command bar.
The optional next step is creating a second Space. Click the + icon in the sidebar, name the Space (Work, Personal, a project), and start dragging tabs and pinned items into it. Spaces in SupaSidebar work across Safari, Chrome, Firefox, and every other supported browser, which is the main reason most users prefer them over Safari's Tab Groups.
Conclusion: Picking what to use
The fastest way to add a real Arc-style sidebar to Safari on Mac in 2026 is to install SupaSidebar, grant Accessibility plus Automation-for-Safari permissions, pick the Browser Sidebar onboarding preset, and choose Live Tabs. Total time: about five minutes. Safari's native sidebar covers Reading List and iCloud-synced bookmarks but does not provide vertical tabs, persistent panels, or workspaces - which is the gap a Mac sidebar app fills.
Different Safari users land in different places. Safari-only users with light tab counts (under 20) and no Arc nostalgia: skip the install, use Safari's Tab Groups in the native sidebar, and revisit the question if tab counts grow. Safari users coming from Arc: the Browser Sidebar preset with Live Tabs is the closest fit, and the 3-click Arc import flow preserves Spaces, folders, and pinned tabs from the previous setup. Multi-browser users on Safari plus Chrome or Firefox: the cross-browser sidebar is the differentiator - one panel handles all of them, with SupaSidebar's 25 supported browsers covering every common Mac setup. Multi-monitor power users: switch from Smart Attach to Independent mode after install, pin the sidebar to a side screen.
Try SupaSidebar (free tier) if a unified Mac sidebar fits the Safari workflow. For deeper context on why Safari extensions cannot replicate this experience, see the Safari Sidebar Extension Guide; for the broader category, see the Mac Sidebar App pillar.
Why we recommend SupaSidebar
SupaSidebar is a macOS app that brings Arc's sidebar to every browser - one sidebar for tabs, bookmarks, files, and apps across 25 browsers including Safari, Chrome, Firefox, Arc, Zen, Vivaldi, Brave, Helium, and Dia. For Safari users specifically, it solves the gap Apple has not closed: a real persistent sidebar with workspaces, persistent across sessions, with iCloud sync across Macs.
Real Safari users describe the install moment in terms that match exactly what this guide just walked through:
"I would love to try to wean myself off Arc and switch to Safari for full macos integration. But without Arc sidebar that will never happen. But… is there a solution for that? Supasidebar?" - Reddit user, r/macapps
"Moved from Arc to Safari, only thing I missed was the sidebar. This is it." - Reddit user, r/macapps
"I just found this today and love the fact that I can have the only thing I liked about Arc straight into the comfort of my Safari - AND have it sync'd via iCloud" - Reddit user, r/macapps
Free tier available with 3 Spaces. Runs natively on macOS 14+. Available at supasidebar.com.
Frequently Asked Questions
How do I add a sidebar to Safari on Mac?
Install SupaSidebar - a native Mac menu bar app, not a Safari extension. The 5-step setup: download, grant Accessibility permission in System Settings > Privacy & Security > Accessibility, grant Automation permission for Safari in System Settings > Privacy & Security > Automation, pick the "Browser Sidebar" onboarding preset, and choose Live Tabs. Safari extensions cannot add a real sidebar because Apple's Safari Web Extensions API does not allow extensions to replace browser chrome - so a native Mac app is the only working approach in 2026.
Why doesn't Safari have a vertical tabs sidebar built in?
Apple has not shipped a vertical-tabs option for Safari and is unlikely to. Per Apple's Human Interface Guidelines, Safari's UI is designed to look consistent across macOS, iPadOS, and iOS, and vertical tabs do not fit a tablet or phone form factor. Safari's built-in sidebar shows Tab Groups, Bookmarks, and Reading List - but does not replace the horizontal tab bar.
Do I need a Safari extension to add a sidebar to Safari?
No, and a Safari extension cannot do the job. Safari extensions run inside an App Sandbox via the Safari Web Extensions API, which does not allow modifying browser chrome or replacing the tab bar. The working solution is a native macOS app that runs in the menu bar and renders the sidebar as a separate window adjacent to Safari.
What permissions does adding a sidebar to Safari require?
Two macOS permissions. Accessibility (System Settings > Privacy & Security > Accessibility) lets the sidebar app position itself against the Safari window and prevent overlapping windows. Automation (System Settings > Privacy & Security > Automation > SupaSidebar > Safari) lets the app read Safari's tab list via AppleScript. Both are reversible toggles; no admin install or kernel extension is required.
How long does it take to set up a Safari sidebar?
About five minutes for first-time setup: download (1 min), grant Accessibility permission (1 min), grant Automation permission for Safari (1 min), pick the Browser Sidebar onboarding preset (30 sec), choose Live Tabs over Recent (15 sec). The longest step is finding SupaSidebar in the System Settings > Privacy & Security lists, which is faster the second time.
Will the Safari sidebar work with Chrome and Firefox too?
Yes. SupaSidebar shows tabs from all 25 supported browsers in the same Live Tabs section. After Safari is set up, granting Automation permission for Chrome or Firefox adds those browsers' tabs to the same sidebar list. Most multi-browser Mac users find this the main reason to install the app over a Safari-only solution.
Can I undo this setup and remove the sidebar later?
Yes. Quit SupaSidebar from the menu bar, drag the app to the Trash, and revoke both permissions in System Settings > Privacy & Security > Accessibility and Automation. Saved links and Spaces are stored locally on the Mac and in iCloud (container iCloud.com.supasidebar); both are removed when the app is uninstalled and the iCloud container is reset.
Does the Safari sidebar sync to iPhone and iPad?
SupaSidebar's data syncs across Macs via iCloud (Spaces, saved links, pinned items, folders), but does not appear on iPhone or iPad. Safari's native iCloud Bookmarks and Reading List remain the cross-device path - keep using those for items needed on iOS.
By Kshetez Vinayak, founder of SupaSidebar. Last updated May 10, 2026.